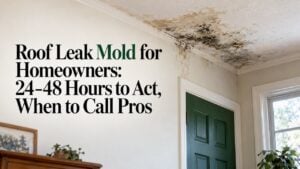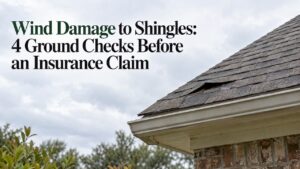
If you see missing shingles, piles of granules in the gutters, water stains on your ceiling, or dented metal vents and flashing after a storm, treat the roof as storm-damaged and move through a clear sequence: confirm everyone is safe, document everything with dated photos, arrange temporary protection against water, and call your insurer. Skip this order only for large leaks, sagging, or anything that looks structurally unsafe, which calls for a professional right away.
- Never climb onto a wet, steep, or sagging roof; call a professional immediately for structural concerns, missing deck sections, or large active leaks.
- Before cleanup, take dated photos and video, list damaged belongings, make necessary temporary repairs, save receipts, and notify your insurer promptly.
- Check roof coverage for actual cash value or replacement cost, identify any separate wind deductible, and avoid signing paperwork that transfers claim control.
- Repair usually suits isolated damage with sound decking and underlayment; widespread damage or soft decking points toward replacement, while age alone is not decisive.
- Bruised shingles can look intact yet fail in later rain, so arrange a professional attic and decking inspection even when ground level damage seems minor.
Table of Contents
- What causes roof storm damage
- Common signs of storm damage to check (ground, roofline, and attic)
- How to safely inspect your roof after a storm
- Immediate next steps after finding storm damage
- Repair versus replacement: how to judge what your roof needs
- When to call a professional and what to expect from their inspection and estimate
- Stalwart Roofing: our inspection process, local experience, and how we handle storm restorations
- Timeline of the storm damage repair process from inspection to completion
- Comprehensive cost overview: repair and replacement pricing, insurance impact, and out-of-pocket costs
- What this checklist gets right (and where typical advice falls short)
- How we can help after a storm hits your roof
- FAQ
- Sources
What causes roof storm damage
Wind is a common culprit. Gusts create uplift pressure that catches under shingle edges, ridges, and corners first, since those areas take the brunt of turbulence as air moves over the roofline. Once a shingle’s seal breaks, wind can peel back entire courses in a single gust.
Hail works differently. It bruises shingles, knocking granules loose and leaving soft spots that weaken the surface without always tearing it open. On metal components like vents, flashing, and gutters, hail leaves visible dents that are often the clearest sign something happened, even when the shingles look fine.
Falling branches and wind-driven debris puncture or tear roofing material directly, while heavy, wind-driven rain forces water sideways into flashing, vent boots, and any gap around a penetration point that a calm rain would never reach. After the storm passes, secondary problems can follow: ice dams in colder months and standing water on flat or low-slope sections, both of which push moisture into places it was never designed to sit.
Common signs of storm damage to check (ground, roofline, and attic)
Start low and work up. Much of what a storm does to a roof is visible from the ground or a window before you go anywhere near a ladder.
- Ground level: shingle fragments in the yard, excess granules collecting in gutters or downspouts, and missing shingle tabs scattered near the foundation.
- Roofline from the yard: shingles that look lifted, creased, or curled; patches of exposed underlayment where shingles are gone; bent or missing flashing around chimneys and vents; dented gutters, downspouts, or vent caps.
- Attic indicators: water stains on the underside of the deck, damp or matted insulation, visible daylight through deck seams, and musty odors or fresh mold that weren’t there before the storm.
Some of this damage hides well. A bruised shingle might look intact and still fail during a later heavy rain, once the weakened spot gives way. That’s why a single dry-weather walk-through isn’t always the end of the story, and a ceiling stain may appear after the storm that caused it.
How to safely inspect your roof after a storm
Safety comes before any inspection. Never walk a wet, steep, or visibly sagging roof, and stay well clear of downed power lines, even ones that look dead. If there’s any doubt about structural stability, wait for a professional with the right equipment rather than testing it yourself.
- Walk the perimeter of the house and photograph the roofline from several angles using a phone or a pair of binoculars for distant detail.
- Check gutters and downspouts at ground level for granules, dents, or disconnected sections.
- Go into the attic with a flashlight and look for new stains, wet insulation, or daylight coming through the deck.
- Note the date and time on every photo set, and keep a simple written log of what you observed and when.
Pro Tip: Photograph damage from a consistent distance and angle each time, and include a visible reference point like a downspout or chimney, so an adjuster can compare images without guessing scale.
Professional crews climb with harnesses, soft-soled boots, and fall protection because a storm-damaged roof can have soft decking or hidden gaps that aren’t obvious from a ladder. They may check the underlayment and decking directly, something that isn’t safe or useful to attempt without training.
Immediate next steps after finding storm damage
What you do in the first hours and days shapes both the repair timeline and the insurance outcome.
- Document the damage thoroughly with date-stamped photos and video before any cleanup begins, and keep an inventory of damaged belongings.
- Make reasonable temporary repairs, such as tarping exposed sections or boarding up openings, to stop further water intrusion.
- Keep every receipt tied to those temporary repairs.
- Notify your insurer promptly and open a claim while the damage is still fresh and documented.
The Post-Disaster Claims Guide advises securing people first, documenting damage before cleanup, making necessary temporary repairs, and keeping receipts.
A few things to watch closely as you move into the claims process:
- Check your policy’s declarations page for a separate wind, hurricane, or named-storm deductible, which can apply even when your general deductible is lower.
- Confirm whether your roof is covered on an actual cash value basis or replacement cost basis, since roofs are sometimes treated differently than the rest of the dwelling.
- Be cautious with any Assignment of Benefits paperwork a contractor asks you to sign. According to guidance from state insurance regulators, signing one can hand control of your claim to a third party, and you are not required to sign one and should be cautious if a contractor pressures you to do so.
For guidance specific to covering exposed areas, our emergency roof tarping guide walks through when tarping is appropriate and how to do it without creating new problems.
Repair versus replacement: how to judge what your roof needs
Isolated damage with a sound deck and underlayment, where matching shingles are still available, usually points to a repair. A single section with wind-lifted shingles near a ridge, for example, can often be re-secured or replaced in that one area without touching the rest of the roof.
Replacement becomes the likely answer when damage is spread across multiple slopes, when the decking underneath is soft or rotted, or when shingles throughout the roof are fractured or shedding granules broadly rather than in one patch. A roof already near the end of its expected service life tips the decision further toward replacement, since storm damage on top of existing wear rarely justifies a patch that won’t last.
Age alone isn’t the deciding factor. A ten-year-old roof with isolated hail bruising on one slope might only need a targeted repair, while a fifteen-year-old roof with widespread granule loss and brittle shingles across every elevation is a stronger candidate for full replacement, partly because matching an older shingle line gets harder every year it ages.
When to call a professional and what to expect from their inspection and estimate
Some signs warrant an immediate call rather than waiting until you’ve finished documenting. Structural sagging, a large interior leak that’s actively dripping, a missing section of roof deck, or any condition that feels unsafe to approach all warrant an immediate call rather than a wait-and-see approach.
A credible inspection includes a full exterior photo survey, an attic check for stains and moisture, a close look at flashing and decking condition, and a written scope of work with an itemized estimate, not just a verbal number. Before authorizing any permanent repair, it’s worth asking a few direct questions.
- Is the contractor licensed and insured in your state, and can they provide proof?
- Do they offer references from recent storm-damage jobs in your area?
- What warranty covers the workmanship, separate from the manufacturer’s material warranty?
- What’s the realistic timeline from signed estimate to finished work?
When an insurance adjuster visits, it helps to have your own photo documentation ready to compare against their assessment. If the settlement offer seems far below what your contractor’s estimate shows, a public adjuster is an option worth considering, though that decision depends on the size and complexity of your specific claim.
Stalwart Roofing: our inspection process, local experience, and how we handle storm restorations
We repair and replace roofs, and our crews are familiar with the ways Gulf Coast wind and hail can damage shingles, flashing, and metal roofing components. Our inspections help you work from documentation rather than guesswork when you talk to your insurer.
Our inspections are built around finding what a storm actually did, not upselling unnecessary work, and qualifying repairs and replacements we complete carry a workmanship warranty. When a storm leaves a roof exposed, we can provide temporary protection to help limit water intrusion while the permanent repair is scheduled.
Timeline of the storm damage repair process from inspection to completion
Most storm repairs follow a predictable sequence, though the length of each stage depends on damage severity and insurance timing. The inspection is scheduled after your call, with timing depending on demand, especially after a major storm event.
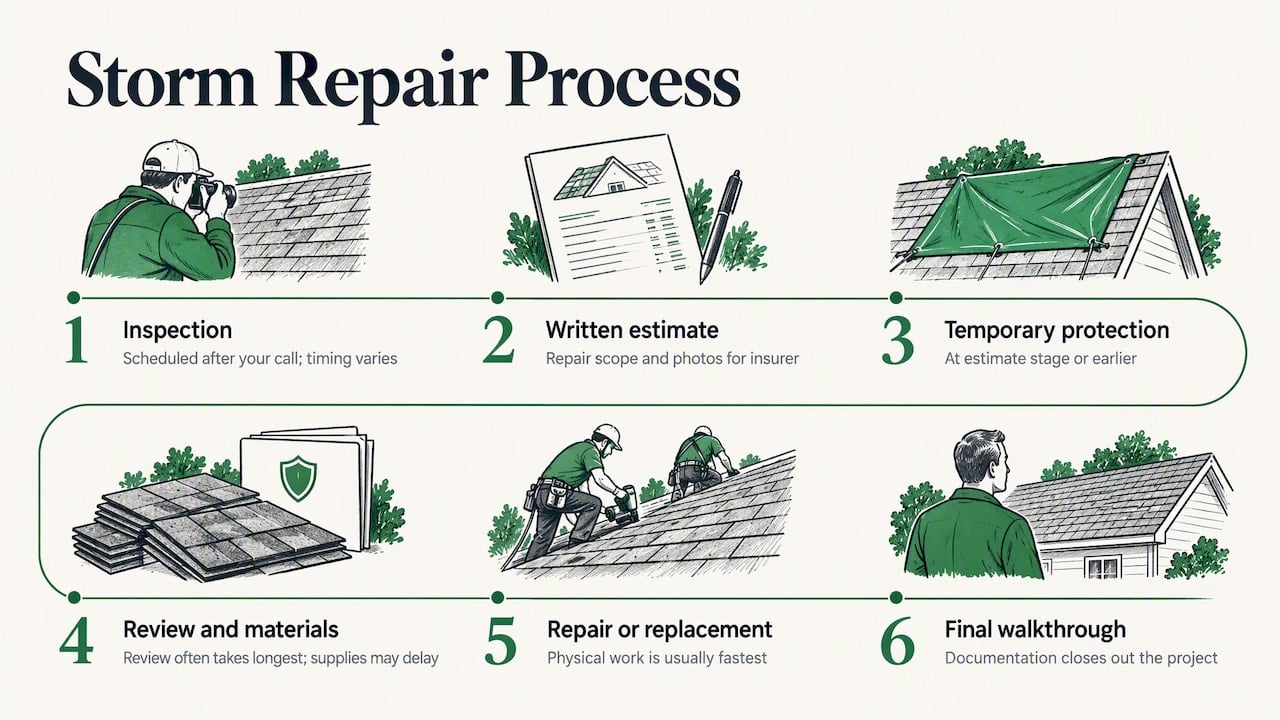
From there, the contractor prepares a written estimate detailing the scope of repair or replacement along with photo documentation you can hand directly to your insurer. If temporary protection like tarping wasn’t already done, it happens at this stage or earlier, since stopping water intrusion takes priority over paperwork.
Insurance review is often the longest variable in the timeline. Once you’ve filed a claim, the timing of an adjuster visit and settlement decision depends on your insurer’s workload and how widespread the storm event was across your area. Material ordering for a full replacement, particularly specialty items like matching architectural shingles or metal panels, can add more time if local supply is tight after a major regional storm.
Once materials are on hand and the claim is settled or a repair path is agreed on, the physical work itself is usually the fastest part. The time needed for a repair or full residential replacement depends on roof size and complexity. A final walkthrough and documentation close out the project, giving you records to keep alongside your insurance file.
Comprehensive cost overview: repair and replacement pricing, insurance impact, and out-of-pocket costs
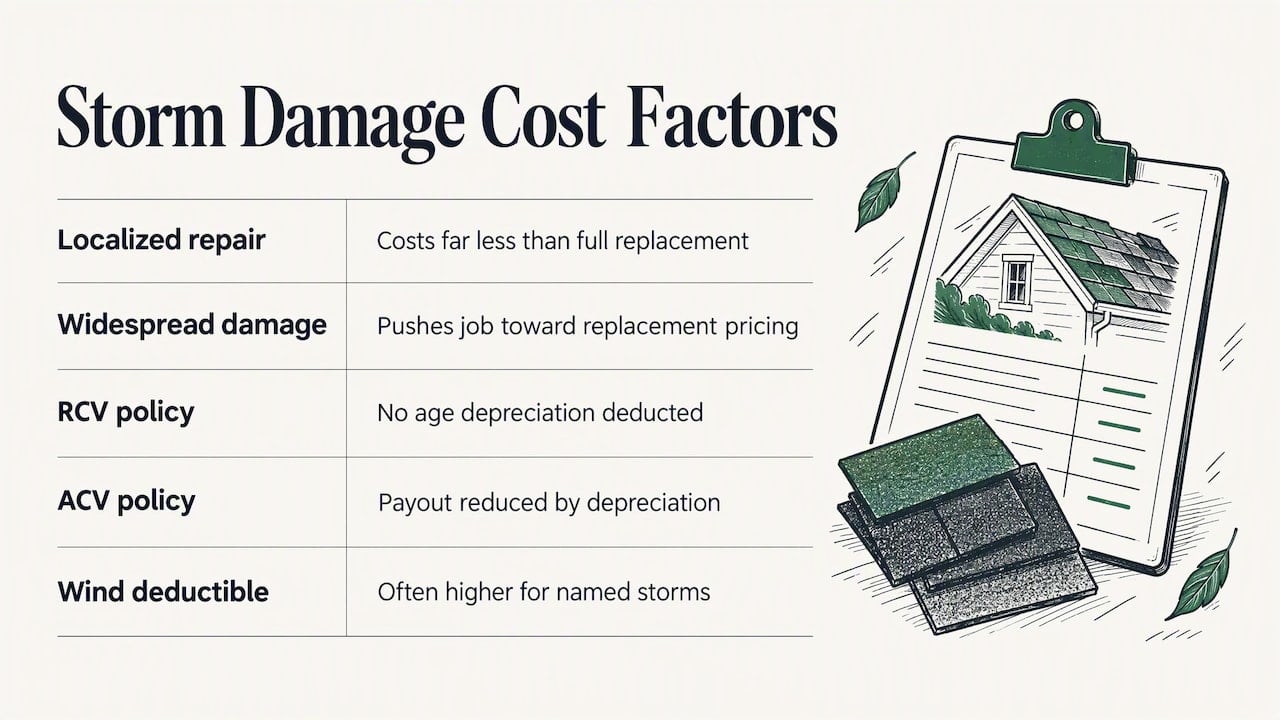
Costs for storm damage work vary widely based on the size of the affected area, the roofing material, and how much of the deck or underlayment needs attention alongside the surface layer. A localized repair, such as resealing a lifted section of shingles or replacing a damaged vent boot, generally costs far less than a full replacement, while widespread hail bruising or wind damage across multiple slopes pushes the job toward full replacement pricing.
Insurance coverage changes the out-of-pocket math significantly. If your policy pays on a replacement cost value basis, your insurer covers the cost to repair or replace at current prices without subtracting for the roof’s age. Under an actual cash value policy, the payout is reduced by depreciation, which can leave a meaningful gap between what the repair costs and what the insurer pays, especially on an older roof.
Your deductible is the other major factor. A standard deductible applies to most claims, but many coastal and storm-prone policies carry a separate, often higher, wind or hurricane deductible that kicks in specifically for named storm damage. Checking your declarations page before you assume what you’ll owe can prevent an unpleasant surprise once the estimate and the insurance settlement are both in hand.
What this checklist gets right (and where typical advice falls short)
The most useful thing a homeowner can do after a storm isn’t climbing onto the roof. It’s documenting what’s visible from the ground and the attic, because that evidence shapes what follows with the insurance claim.
Generic storm advice tends to overweight the dramatic signs, missing shingles, visible holes, and underweight the quieter ones that cause more long-term damage: granule loss, bruised shingles that still look intact, and small gaps in flashing that leak only during the next hard rain. Homeowners who stop inspecting once they’ve confirmed “nothing’s obviously wrong” may miss damage that can lead to more extensive repairs later.
If there’s one priority to put ahead of everything else, it’s getting a professional set of eyes on the roof even when the damage looks minor from the ground. A trained inspector checking the attic and decking catches what a phone camera from the yard never will, and that single step does more to protect a homeowner’s claim and their roof than any amount of careful photography alone.
How we can help after a storm hits your roof
We handle storm response, from temporary protection to help limit water intrusion, to inspections, repairs, and storm damage restoration when that’s what the roof needs.
- Emergency roof tarping to protect your home while repairs are scheduled
- Roof inspections
- Storm damage restoration and targeted repairs for isolated damage
- Full roof replacement when the damage calls for it, backed by a workmanship warranty on qualifying jobs

When you call us, we walk the roof, give you a clear picture of what we find, and quote the work honestly before anything gets scheduled. If your roof took a hit in the last storm, schedule an inspection and we’ll tell you exactly where things stand.
FAQ
Does homeowners insurance cover roof damage from a storm?
Most homeowners policies cover sudden storm damage from wind, hail, or falling debris, though coverage details depend on your specific policy and deductible structure. Check your declarations page for a separate wind or hurricane deductible, and follow the Post-Disaster Claims Guide recommendation to document damage and report your claim promptly.
Will insurance cover a 20-year-old roof?
Coverage for an older roof depends on whether your policy pays actual cash value or replacement cost value for roofing specifically. Under actual cash value, the payout is reduced for age-related depreciation, so an older roof typically receives a smaller settlement than a newer one with the same damage.
What is the 25 percent rule in roofing?
Definitions of this rule vary by jurisdiction and insurer, and it generally refers to a threshold some building codes or policies use to decide whether a partial roof repair must extend to the entire roof section or slope. Because the exact trigger differs by location, it’s worth confirming the specific standard that applies with your contractor or local building authority.
Can a roofer be held responsible for an injury on my property?
Liability after a fall during roof work depends on factors like the contractor’s insurance coverage and the specific circumstances of the incident, which makes it a question for a licensed, insured contractor and your own homeowner’s policy rather than a one-size-fits-all answer. Confirming a contractor carries proper liability and workers’ compensation coverage before work begins is the most reliable way to limit your exposure.